Decluttering and Waste Management
Organizing Your Space Like a Pro
Let’s sort out that living room chaos when tackling DIY home improvements. The first move? Clear the clutter and get things in order. You might be surprised how arranging your furniture just right can make your space both useful and easy on the eyes. Think smart setup: defined chatting areas and open pathways for a real transformation.
Here’s a few tricks to keep things tidy:
- Built-in Shelves: Max storage without taking up floor space. It’s like magic.
- Under-Stair Storage: Often neglected but great for stashing stuff.
- Custom Closets: Made to fit your exact needs—like a glove.
These storage ideas can turn your cluttered mess into a tidy, well-organized space (Freccia Group).
Smart and Green Waste Disposal
Got renovation mess? No sweat. Handling waste responsibly doesn’t just keep your project smooth—it’s good for the planet too.
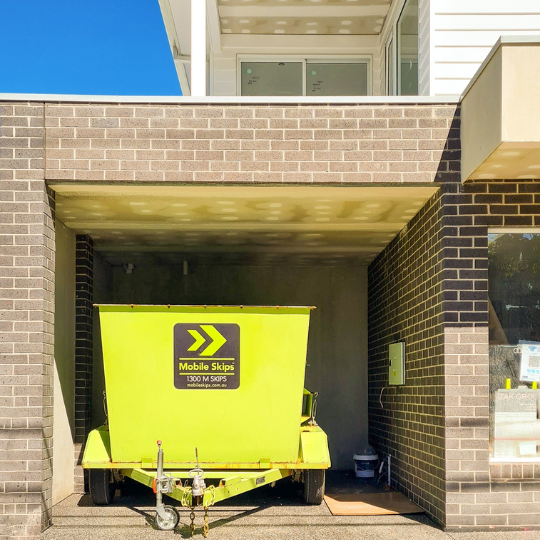
Mobile skip bins are a real game-changer for this. Unlike traditional skips, they don’t need any permits, making them super convenient (Mobile Skips). Plus, Mobile Skips has a sweet deal: they plant a tree for every bin hired. You’re cleaning up and planting trees. Win-win (Mobile Skips).
Check out the differences:
| Waste Disposal Method | Features | Environmental Impact |
|---|---|---|
| Traditional Skip Bin | Needs permits, stays put | Meh |
| Mobile Skip Bin | No permits, moveable | Plants trees |
Choosing greener ways to manage your renovation mess helps you avoid hassle and be eco-friendly at the same time. Now get ready to create a living room that’s neat, organized, and kind to Mother Earth!
DIY Living Room Renovations
Make Your Living Space Pop
Who says you need to hire pros to jazz up your living room? Doing it yourself can save you a big chunk of change, especially with labor costs eating up your budget (Bankrate). So roll up those sleeves, here’s how you can give your living space a facelift:
-
Painting:
Slap on a new coat of paint, and watch your room come alive. It’s one of the most budget-friendly ways to add your style without emptying your wallet. -
Rearranging Furniture:
Tried and true, just changing your furniture layout can make your place feel new. Move those pieces around to see what arrangement boosts flow and comfort. -
Installing Shelves:
Need more storage? Floating shelves are a breeze to install. Stack ’em with decor or books to make your room both handy and pretty. -
Lighting:
New lights can set the vibe. Swap out old fixtures or add some funky floor and table lamps. Plus, LED bulbs help keep energy bills low. -
Adding Greenery:
Nothing adds life like plants. Don’t have a green thumb? No worries—grab some low-maintenance ones and you’re good to go.
Budget-Friendly Hacks
Worried about going overboard with spending? A budget’s your best friend. Proper planning saves you from financial headaches during your DIY adventure (Lemon Thistle). Here’s some know-how:
-
Prioritize:
Focus on what’s necessary. Fix any key issues and make the most impactful changes first. -
Research Costs:
Know what you’re getting into. Compare prices for materials and tools both online and in-store to snag the best deals. -
Track Every Cent:
Keep tabs on every expense. A detailed list will keep you grounded.
| Item | Cost Estimate ($AUD) |
|---|---|
| Paint | $30 – $70 per can |
| Brushes/Rollers | $5 – $20 each |
| Shelves | $20 – $100 |
| Lighting | $25 – $150 |
| Plants | $10 – $50 each |
-
Contingency Funds:
Set aside a bit extra for those “Oh no!” moments. Trust me, they’ll happen. -
DIY vs. Pro Help:
Know your limits. Some things, like electrical work, might need a pro—better safe than sorry.
Investing in must-have tools like a drill and an impact driver can make your projects easier (NYMag Strategist). With a little planning and elbow grease, a DIY renovation can be manageable and super satisfying.
Essential Tools for DIY Projects
When you’re sprucing up your living room or taking on any DIY project, the tools you use can make all the difference. Having the right gear makes your job smoother and ensures you don’t end up with a half-baked result.
Must-Have Tools for Home Renovations
Whether you’re a DIY veteran or dipping your toes into home projects for the first time, some tools are non-negotiable. Here are the must-haves to get you started:
- Hammers: Keep two hammers at the ready—just in case one plays hide-and-seek (NYMag Strategist).
- Screwdrivers: You’ll need both flathead and Phillips screwdrivers; they’re like the Swiss Army knives of tools.
- Tape Measure: Measure twice, cut once. Measure your walls, furniture, and materials with precision.
- Utility Knife: Perfect for cutting, scraping, and trimming tasks.
- Ladder: A trusted ladder is a must for anything high up, from painting ceilings to changing light fixtures (NYMag Strategist).
- Power Drill: Whether you’re drilling holes or driving screws, a power drill is indispensable.
Tools for Specific Renovation Tasks
Some tasks call for specialized tools to make the job quicker and easier. Here’s what you’ll need for different jobs in your living room renovation:
Removing Cabinetry
- Impact Driver: The DeWalt 20-volt impact driver works wonders for removing cabinets.
- Reciprocating Saw: Great for breaking big, bulky cabinets down into smaller, manageable pieces.
| Task | Tool | Brand/Model |
|---|---|---|
| Removing Cabinets | Impact Driver | DeWalt 20-volt |
| Breaking Down Cabinets | Reciprocating Saw | Sawzall |
Demolition
- Wrecking Bar: The 30-inch Gooseneck Wrecking Bar is your best friend for tearing down drywall, ripping out plaster, chiseling tiles, and removing stubborn nails or glue (NYMag Strategist).
Painting and Finishing
- Paint Rollers and Brushes: Nothing gives an even coat of paint on walls and ceilings better.
- Painter’s Tape: For those crisp, clean edges.
- Sandpaper and Sanding Blocks: Smooth surfaces are key to a professional paint job.
With the right tools, you’re set to tackle your DIY living room renovation head-on. Investing in solid equipment means making your job easier while achieving results that’ll make you look like a pro.
Cool Ideas for Smarter Waste Disposal
Renovating your living room? Yeah, it can turn your house into a junkyard for a bit. But don’t worry, we’ve got some nifty ways to keep things tidy. From mobile skip bins to teaming up with donation programs, here’s how you can handle all that mess without losing your mind.
Why Mobile Skip Bins Rock
Mobile skip bins are like magic boxes for all that renovation trash. They’re super handy and make your cleanup job a breeze.
Check out why they’re awesome:
- Easy Peasy: You can book them online and get them delivered or picked up whenever you want.
- Move ‘Em Around: Need it here, then over there? No problem.
- Right Size for the Job: They come in different sizes, so you don’t end up with a bin way too big or too small.
- Eco-Friendly: Helps you recycle and dispose of waste the right way.
| Bin Size | Volume (m³) | Perfect For |
|---|---|---|
| Small | 2 | Little projects, spring cleaning |
| Medium | 3 | Regular living room makeovers |
| Large | 4 | Big renovations, heavy-duty stuff |
Source: Mobile Skips
Partnering with Vinnies: Waste Less, Donate More
What’s cooler than getting rid of stuff? Giving it a second life! Mobile Skips has teamed up with St Vincent de Paul Society (Vinnies) in Melbourne, Victoria. This means when you’re making space, you can also donate items in good condition.
Here’s how it works:
- Get Vinnies Bags: When you order a bin, you’ll get some donation bags too.
- Fill ’Em Up: Toss in items that are still in good shape.
- They Pick It Up: When they come for the bin, they grab the donation bags as well.
Why this is amazing for you:
- Less junk ends up in landfills.
- You help out those in need.
- Mixes decluttering with doing a good deed.
So, how about it? With these smart waste disposal ideas, you don’t just clean up after your renovation—you also make a positive impact. It’s a win-win!
Brightening Up Your Living Room
Who doesn’t want a living room that screams spaciousness and light? Here’s how to make it happen without breaking the bank or your back.
Double-Duty Spaces
Why settle for just one use when you can have double or triple the function?
- Built-in Shelves: Chuck that clunky bookshelf. Built-in shelves keep everything nice and tidy, from your Hemingway novels to that odd vase from Aunt Martha.
- Under-Stairs Nook: Don’t let that space under the stairs gather dust. Stash away shoes, toys, or holiday decorations there instead.
- Custom Closets: No more shouting “Who moved my stuff?” Get custom closets made to fit all your junk, big and small (Freccia Group).
| Storage Hack | Perks |
|---|---|
| Built-in Shelves | Saves space, looks neat |
| Under-Stairs Nook | Grabs unused space |
| Custom Closets | Everything has a place |
Nature’s Touch
Feel that Mother Nature vibe indoors. It’s good for the soul and the eyes.
- Houseplants: Peace lilies, spider plants, succulents – they’re not just for your grandma’s house anymore. These little green friends clean your air and look cute doing it (Thoughtful Misfit).
- Natural Stuff: Swap out plastic for wood, stone, or bamboo. Bam—instant warmth and style.
- Sunlight Magic:
- Bigger Windows: Knock out some wall space for larger windows. Let that green-tinted light pour in.
- Skylights: A sneaky way to get more sun. Plus, they’re great conversation starters.
- Glass Doors: Say goodbye to dark rooms and hello to open and breezy with some sleek glass doors.
| Nature Trick | Why it’s Awesome |
|---|---|
| Houseplants | Clean air, cozy vibes |
| Natural Materials | Warm feel, more texture |
| Bigger Windows | More daylight, welcoming |
| Skylights | Extra light, cool factor |
| Glass Doors | Brighter space, open feel |
Follow these tips, and your living room won’t just be a place to crash—it’ll be the place to be.
Home Renovation Tips and Tricks
Phasing Projects Smartly
Want to keep your DIY living room remodel stress-free and wallet-friendly? Break it up into small, manageable pieces. Here’s the 101 on how to do it right:
-
Game Plan: Draft out what changes you’re looking for. Measure everything, sketch design ideas, and list your materials.
-
Money Talk: Carve out a realistic budget for your revamp. Costs will include materials, tools, and maybe a contractor fee. You could save by doing some jobs yourself or opting for cheaper materials.
-
Clear the Room: Say goodbye to old furniture. Clear out the space and chuck the waste safely. Mobile skip bins are your new best friend.
-
The Big Stuff: First, tackle the structural bits—lay new flooring, slap on some fresh paint, or put up that drywall.
-
Finishing Touches: Now comes the fun stuff! Add the final touches like chic lighting, decor, and furnishings.
Phasing Schedule Example:
| Phase | Duration |
|---|---|
| Game Plan | 1 week |
| Money Talk | 1 week |
| Clear the Room | 2 days |
| The Big Stuff | 2-3 weeks |
| Finishing Touches | 1 week |
Chat closely with your contractor to set a flexible timeline and coordinate tasks.
Crafting Functional Living Spaces
A stylish and practical living room is a win-win. Here’s how to pull it off:
-
Arrange Smart: Place furniture to create zones—one for reading, one for lounging, and maybe a nook for games.
-
Natural Vibes: Bring in indoor plants, wooden furniture, and plenty of natural light to create a relaxing space.
-
Storage Hacks: Employ clever storage solutions like built-in shelves, storage under the sofa, and multifunctional furniture to keep clutter at bay.
-
Light It Up: Mix up ambient, task, and accent lighting to set the mood and make your room inviting.
-
Color It In: Pick a color palette that gels with your style and the rest of your house.
Functional Design Features
| Feature | Benefit |
|---|---|
| Multifunctional Furniture | Maximizes space efficiency |
| Built-in Shelves | Provides extra storage |
| Natural Lighting | Boosts mood, cuts down on energy bills |
| Indoor Plants | Cleans air, adds a touch of green |
| Flexible Layout | Morphs to your activities |
Transforming your living room into a functional paradise means blending thoughtful planning with creativity. Follow these tips, and you’ll have a space that’s not just a feast for the eyes, but comfy for everyday living.

