The Art of Decluttering
Decluttering is a key step in any DIY home renovation project. It sets the stage for your renovations and makes the whole process smoother and more enjoyable.
Tackling Clutter in Your Home
Getting rid of clutter can feel overwhelming, but with the right approach, you can turn your home into an organized haven. Here are some tips to get you started:
- Start Small: Begin with one room or even just a section of a room. This makes the task more manageable.
- Sort Items: Create categories for items: keep, donate, recycle, and toss.
- Use Storage Solutions: Invest in organizers, bins, and shelves to keep things tidy.
- Stay Consistent: Dedicate a few minutes each day to decluttering to maintain a clutter-free home.
For more detailed tips and methods, check out our article on DIY decluttering tips.
Benefits of Decluttering
Decluttering offers many benefits beyond just having a tidy home. Here are some advantages:
| Benefit | Description |
|---|---|
| Reduces Stress | A clutter-free environment can significantly reduce stress and anxiety (Mobile Skips). |
| Increases Productivity | An organized space can boost your productivity and help you focus better. |
| Enhances Creativity | Clear spaces can enhance creativity by providing a calm environment. |
| Improves Safety | Reducing clutter can minimize the risk of accidents and injuries at home. |
By decluttering, you not only make your home more pleasant but also set the stage for successful DIY furniture renovations.
For more on how to tackle clutter and its benefits, explore our guides on DIY decluttering hacks and DIY decluttering methods.
DIY Renovations: Where to Start
Kicking off a DIY furniture renovation project can be a mix of excitement and a bit of “what have I gotten myself into?” But with some good planning and a sensible budget, you can turn that old, tired furniture into something that makes your home shine. Let’s get rolling.
Planning Your Renovation Project
Before you grab that paintbrush, take a minute to plan things out. First, decide which pieces of furniture you want to tackle. Check them out to see what kind of shape they’re in. Are we talking a simple paint job, or does it need a full reupholster?
Make a list of everything you’ll need. Think sandpaper, paint, brushes, fabric, and whatever else your project calls for. For a full rundown on tools, check out our DIY home renovation tools page.
Here are some questions to help you get started:
- What’s the current state of the furniture?
- What’s the look you’re going for?
- What materials do you need?
- How much time do you have?
Here’s a quick checklist to keep you on track:
- Pick your furniture
- Check its condition
- List out materials and tools
- Set a timeline
Need some ideas? Swing by our DIY home renovation ideas section.
Setting a Budget
Budgeting is key to any DIY project. Knowing your spending limit helps you make smart choices and avoid blowing your budget. Start by looking up the costs of the materials and tools you’ll need.
Here’s a rough idea of what you might spend:
| Item | Estimated Cost |
|---|---|
| Sandpaper | $5 – $10 |
| Paint | $20 – $50 |
| Brushes | $5 – $15 |
| Fabric | $10 – $30 per yard |
| Tools (e.g., screwdriver, hammer) | $10 – $50 |
Once you have an idea of the costs, see how they stack up against your budget. If you’re over, think about cheaper materials or scaling back your project. For more budgeting tips, check out our DIY home renovation on a budget page.
Don’t forget about waste management. Getting rid of old materials properly and recycling can save you some cash and help the planet. For tips on waste removal, visit our waste removal tips article.
Budgeting Tips:
- Look up material costs
- Compare with your budget
- Consider cheaper options
- Plan for waste management
Starting a DIY furniture renovation project can be super satisfying. With good planning and a solid budget, you can turn old furniture into beautiful pieces that add a personal touch to your home. For more tips and ideas, check out our DIY home renovation blogs.
Transforming Furniture
Revamping old furniture can give your home a fresh, stylish vibe. Here’s how to get started with ease.
Getting Ready to Paint
Prepping your furniture for painting is key to getting that pro finish.
- Clean It Up: Start by giving your furniture a good scrub to remove dirt and grime. Clean surfaces help paint stick better.
- Remove Hardware: Take off any knobs, handles, or other hardware so they don’t get in the way.
- Sand It Down: Sand the surface to create a texture for the primer and paint to grip. Sanding between coats is also crucial for a smooth finish (Erin Spain).
- Prime Time: Apply an oil-based primer to cover stains and help the paint adhere well (Erin Spain). Let the primer dry completely before painting.
| Step | Tools Needed | Purpose |
|---|---|---|
| Cleaning | Mild detergent, sponge | Remove dirt and grime |
| Sanding | Sandpaper (fine-grit) | Create a texture for paint |
| Priming | Oil-based primer, brush | Help paint adhere, cover stains |
Choosing Green Materials
Going green with your DIY furniture projects is not only good for the planet but also for your health.
- Eco-Friendly Paints: Pick paints with low VOCs (volatile organic compounds) to cut down on harmful emissions. Brands like Benjamin Moore and Sherwin-Williams have eco-friendly options.
- Recycled or Reclaimed Wood: Using recycled or reclaimed wood adds character and reduces waste. It’s a great way to make unique pieces.
- Natural Fabrics: For reupholstering, go for natural fabrics like organic cotton, linen, or hemp. These materials are biodegradable and have a lower environmental impact.
Choosing sustainable materials means you’re helping the planet and making your home healthier. For more eco-friendly renovation tips, check out our DIY home renovation ideas.
Internal Links
- DIY bathroom renovations
- DIY kitchen renovations
- DIY home renovations
- DIY home renovation ideas
- Home renovation tips
- DIY organization ideas
- DIY home improvement projects
- DIY home renovation on a budget
- Easy DIY home renovations
- DIY home renovation blogs
- DIY bedroom renovations
- Budget-friendly home renovations
- DIY home renovation tools
- DIY home renovation costs
- DIY home renovation before and after
- DIY flooring renovations
- DIY painting renovations
- DIY wall renovations
- DIY lighting renovations
- DIY storage renovations
- DIY decluttering tips
- DIY decluttering hacks
- DIY decluttering methods
- DIY decluttering checklist
- Minimalist home renovations
- DIY garden renovations
- DIY outdoor renovations
- DIY living room renovations
- DIY home office renovations
Transforming furniture with sustainable practices not only makes your home look great but also supports a greener, healthier environment.
Furniture Makeover Magic
Getting Started with Priming and Painting
Alright, let’s talk about giving your old furniture a new lease on life. First things first, priming is your best friend. It helps the paint stick better and hides those pesky stains or discolorations in the wood. Trust me, you don’t want to skip this step. Oil-based primers are the go-to for furniture.
- Clean Up: Get rid of any dirt or grime. A clean surface is a happy surface.
- Sand It Down: Grab some fine-grit sandpaper and smooth out the surface. This makes the paint stick like glue.
- Prime Time: Use a brush or roller to slap on an even coat of primer.
Top Picks for Primers
| Primer Type | Best For |
|---|---|
| Oil-Based Primer | Most furniture types |
Once you’re primed and ready, it’s time to paint. Sanding between each coat is key to getting that pro look. Don’t forget to wipe off the dust each time.
- First Coat: Apply the first coat evenly. No rush, take your time.
- Sand Again: Once it’s dry, give it a light sanding.
- Second Coat: Go for full coverage with a second coat.
- Final Sanding: One last sanding for that silky smooth finish.
Sealing and Adding Character
Sealing your painted masterpiece is like putting a protective shield on it. It makes the surface easy to clean and keeps the paint looking fresh. Water-based topcoats like Minwax Polycrylic or furniture wax are solid choices, except for white paint.
Go-To Sealers
| Sealer Type | Best For |
|---|---|
| Minwax Polycrylic | Various colors |
| Furniture Wax | Most colors except white |
Now, if you want to add some character, distressing is the way to go. Use fine-grit sandpaper after the last coat of paint and before sealing to get that vintage look. Let the sealed furniture sit for a day or two to avoid any mishaps.
- Distress the Edges: Lightly sand the edges and corners.
- Wax On: Apply furniture wax to seal those distressed areas.
- Final Touches: Let it sit for a day or two.
Check out more DIY home improvement projects and DIY home renovation tools to get fully equipped for your furniture makeover adventures. These techniques will turn your old furniture into gems that brighten up your home.
Eco-Friendly Furniture Restoration
Ready to give your old furniture a new lease on life while being kind to the planet? Let’s talk about two awesome ways to do just that: reupholstering and repurposing. These methods not only help you cut down on waste but also let you make some pretty cool, sustainable choices.
Reupholstering for Sustainability
Reupholstering is like giving your furniture a makeover. Instead of tossing that old chair or couch, you can refresh it with new fabric and padding. Plus, you get to keep it out of the landfill. Win-win, right?
Here are some eco-friendly materials you might want to use:
| Material | Why It’s Cool |
|---|---|
| Organic Fabrics | Natural fibers, no nasty chemicals. |
| Recycled Textiles | Made from old stuff, so less waste. |
| Natural Latex Foam | Comes from rubber trees, not factories. |
| Wool and Horsehair | Durable, natural, and breaks down easily. |
| Water-based Adhesives | Less toxic, better for the planet. |
| Organic Dyes | Natural colors without harmful chemicals. |
| Recycled Leather | Uses scraps, so nothing goes to waste. |
Here’s a quick rundown on how to reupholster in an eco-friendly way:
- Check the furniture: Is it worth saving?
- Imagine the new look: What’s your vision?
- Pick sustainable materials: Go green with your choices.
- Find a green upholsterer: If you need help, get someone who knows eco-friendly practices.
- Remove old fabric: Carefully strip it down.
- Fix any issues: Repair any broken parts.
- Add new padding: Use sustainable stuff.
- Sew on new fabric: Cover it up with your chosen material.
- Finish it off: Add buttons, trims, whatever you like.
- Enjoy: Sit back and admire your handiwork.
By choosing sustainable materials and methods, you’re not just saving money; you’re also doing your bit for the planet. For more DIY tips, check out our DIY home improvement projects section.
Repurposing Old Furniture
Repurposing is all about giving old furniture a new job. It’s creative, fun, and super rewarding. Plus, it’s great for the environment.
Why repurpose?
- Save money: Use what you already have.
- Keep memories: Hold onto sentimental pieces.
- Customize: Make it fit your style.
- Reduce waste: Keep stuff out of the trash.
- Lower carbon footprint: Less demand for new furniture.
- Support local: Often involves local craftsmen.
- Unique look: Create one-of-a-kind pieces.
Got some old furniture lying around? Here are some ideas:
- Old dresser to bathroom vanity.
- Vintage suitcase to coffee table.
- Antique door to headboard.
- Wooden ladder to bookshelf.
- Wooden pallet to garden planter.
Repurposing lets you create unique, personalized pieces while being eco-friendly. For more inspiration, visit our DIY home renovation ideas.
Need more tips on keeping your home green? Check out our DIY decluttering tips and DIY home renovation on a budget sections.
Waste Management Tips
Got a DIY furniture project on your hands? Managing waste is a big part of the process. Here’s how to handle it like a pro, without turning your home into a landfill.
Smart Waste Removal
Getting rid of waste the right way keeps you safe and helps the planet. Here’s how to do it:
- Sort It Out: Separate your waste into recyclables, hazardous stuff, and general trash. Makes life easier.
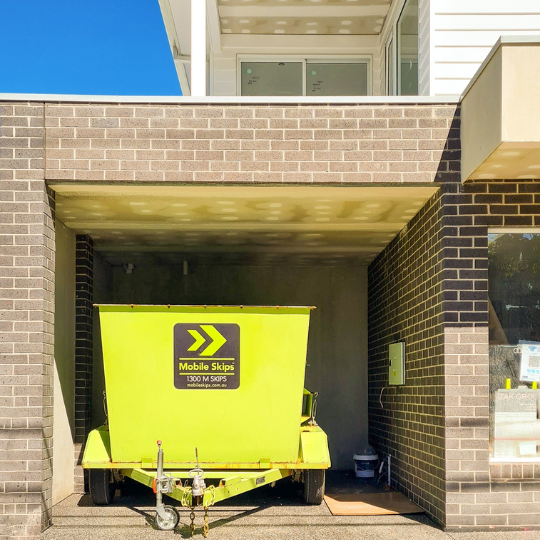
- Skip the Hassle: For big projects, hire a skip bin. Companies like Mobile Skips make it simple to get rid of your junk responsibly.
- Gear Up: Always wear gloves, masks, and safety glasses when handling waste. No one wants a trip to the ER.
- Know the Rules: Check local council regulations to avoid fines and stay on the right side of the law.
| Waste Type | How to Get Rid of It |
|---|---|
| Recyclable Stuff | Recycling Bins or Centers |
| Hazardous Waste | Special Collection Services |
| General Trash | Skip Bins or Landfills |
Need more tips? Check out Dispose with Ease: Top Strategies for Renovation Waste Removal.
Recycling and Repurposing
Recycling and repurposing not only save the planet but also add a cool twist to your projects. Here’s how:
- Recycle Soft Plastics: Things like packaging, bags, and wraps can be recycled. Mobile Skips has some creative ideas for this.
- Give Old Furniture New Life: Turn an old dresser into a TV stand or reupholster a worn-out chair. Check out our article on repurposing old furniture.
- Compost Green Waste: Got leaves, branches, or grass clippings? Compost them. For more eco-friendly tips, see our section on eco-friendly furniture restoration.
| Material | Repurposing Ideas |
|---|---|
| Old Wood | Shelves, Garden Planters |
| Metal | Art Pieces, Furniture Legs |
| Fabric | Upholstery, Decorative Items |
For more DIY inspiration, visit our DIY home renovation ideas and DIY home renovation on a budget sections.
By following these tips, your DIY furniture projects will not only look great but also be kind to the environment.

