Planning Your Renovation Waste Removal
Renovating your home is thrilling, but dealing with the mess? Not so much. Let’s make waste management a breeze with some smart planning.
Assessing Your Waste
First things first, figure out what kind of junk you’ll be dealing with. Knowing this helps you decide the best way to get rid of it and maybe even recycle some of it.
Types of Waste:
- Construction Debris: Bricks, concrete, tiles.
- Wood: Old cabinets, doors, flooring.
- Metal: Pipes, fittings, fixtures.
- Plastics: Pipes, packaging, fixtures.
- Hazardous Materials: Paint, asbestos, chemicals.
Estimate how much waste you’ll have:
| Waste Type | Estimated Volume (cubic meters) |
|---|---|
| Construction Debris | 2 |
| Wood | 1.5 |
| Metal | 0.5 |
| Plastics | 0.3 |
| Hazardous Materials | 0.1 |
Use this info to pick the right containers or skips. Need more details? Check out our guide on home renovation debris removal.
Creating a Removal Plan
Now that you know what you’re dealing with, let’s make a plan to get rid of it all.
Steps to Create a Removal Plan:
- Check Local Rules: Make sure you’re following diy waste removal regulations.
- Pick the Right Containers: Choose skips or bins that fit your waste.
- Schedule Pickups: Arrange for diy waste removal services to come regularly.
- Handle Hazardous Waste Carefully: Store and dispose of dangerous stuff safely (diy waste removal safety precautions).
- Set Up Sorting Stations: Have spots for recyclables, upcyclables, and trash (diy waste removal best practices).
Planning ahead saves you time and hassle. For more tips, check out waste management for diy projects and diy waste removal time-saving tips.
Proper planning and assessment are key to managing your renovation waste effectively. Whether you’re doing it yourself or hiring pros, having a clear strategy will make the process smoother and more eco-friendly.
Sustainable Disposal Options
Renovating your home? Let’s talk about ditching waste the green way. Not only does it help Mother Earth, but it also makes your project eco-friendly. Here, we’ll dive into two main strategies: recycling materials and upcycling furniture.
Recycling Materials
Recycling is a no-brainer for handling renovation waste. It cuts down on landfill junk, saves resources, and keeps our planet healthier.
- Spotting Recyclables: Figure out what you can recycle from your renovation mess. Metals, glass, wood, and some plastics are usually good to go.
- Local Recycling Spots: Check with your local council or waste service for recycling options. Many places have special centers for construction and renovation waste.
| Material | Recycling Rate (%) | Notes |
|---|---|---|
| Metals | 90% | Aluminium, steel, and copper are super recyclable. |
| Glass | 70% | Glass can be recycled over and over without losing quality. |
| Wood | 60% | Wood can turn into mulch, compost, or new wood products. |
| Plastic | 25% | Only some plastics are recyclable. Check with local facilities. |
Figures based on Johnson, 2018.
For more info, visit our detailed guide on recycling options for DIY waste.
Upcycling Furniture
Upcycling is a fun and eco-friendly way to handle old furniture. Instead of tossing it, you can turn it into something new and cool. This cuts waste and adds a unique touch to your home.
- Finding Upcycling Gems: Look at your old furniture and think about how you can repurpose it. An old door can become a trendy table, or a beat-up dresser can turn into a chic bathroom vanity.
- DIY Upcycling Projects: Tons of DIY projects and tutorials online can help you upcycle. Whether you’re repainting, reupholstering, or totally transforming the piece, the sky’s the limit.
| Furniture Piece | Upcycling Idea | Difficulty Level |
|---|---|---|
| Old Door | Convert into a dining table | Medium |
| Worn-out Dresser | Transform into a bathroom vanity | High |
| Wooden Pallets | Create outdoor furniture | Low |
| Bookshelf | Turn into a bar or pantry storage | Medium |
For creative ideas and inspiration, check out our article on DIY waste removal best practices.
By mixing recycling and upcycling into your renovation, you can make a big difference for the environment while creating a unique home. For more tips and tricks, explore our resources on waste management for DIY projects and DIY waste removal eco-friendly options.
Hiring Waste Removal Services
Getting a waste removal service for your home renovation can be a real lifesaver. It takes the stress out of dealing with all that debris and makes sure everything gets disposed of the right way.
Picking the Right Service
Finding the right service for home renovation debris removal isn’t just about picking the first company you see. Here’s what you should look for:
- Experience and Reputation: Go for a service with a good track record. Experienced companies are more likely to handle your waste efficiently and follow the rules.
- Recycling Options: Choose services that offer recycling to cut down on your environmental footprint. This is especially important if you’ve got recyclable stuff like metal, wood, or certain plastics (Source B).
- Disposal Methods and Certifications: Make sure the service uses eco-friendly disposal methods and has the right certifications. This might include certifications from local or national environmental agencies (Source C).
Need more tips on picking a service? Check out our article on diy waste removal services.
Costs and Considerations
Knowing the costs involved in hiring a waste removal service can help you budget better. Here are some things to keep in mind:
- Detailed Quotes: Always get detailed quotes from several services. This will give you a clear idea of the costs and help you compare what each service offers (Source D).
- Distance: Think about how far the service needs to travel to get to you. Distance can affect pricing, especially if the service charges for fuel or travel time (Source E).
- Service Inclusions: Look at what each quote includes. Some services might offer extras like on-site sorting, hazardous waste removal, or even site clean-up. These can add value and save you time.
Here’s a quick comparison table to help you evaluate different quotes:
| Service Provider | Cost ($) | Distance (km) | Recycling Options | Extra Features |
|---|---|---|---|---|
| Service A | 200 | 10 | Yes | On-site Sorting |
| Service B | 250 | 20 | No | Site Clean-up |
| Service C | 220 | 15 | Yes | Hazardous Waste Removal |
For more info on costs, visit our page on diy waste removal cost.
By considering these factors, you can make a smart choice and pick the best waste removal service for your needs. If you want to learn more about managing renovation waste, check out our article on waste removal for home renovations.
DIY Waste Removal Tips
Safety First
When you’re knee-deep in a renovation project, keeping yourself safe is a no-brainer. Here’s how to stay out of harm’s way:
-
Gear Up: Don’t skimp on the basics—gloves, safety glasses, and sturdy shoes are your best friends (Environmental Health and Safety Magazine). They’ll shield you from sharp bits, dust, and other nasties.
-
Right Tools for the Job: Wheelbarrows, heavy-duty bags, and dust masks are must-haves. They make handling heavy and hazardous stuff a breeze.
-
Keep It Tidy: A clean workspace is a safe workspace. Clear pathways to avoid tripping over debris (Occupational Safety and Health Review).
-
Lift Smart: Bend your knees, keep your back straight, and lift with your legs. Your back will thank you.
-
Hydrate and Rest: Renovation can be a workout. Drink water and take breaks to keep your energy up and your mind sharp.
For more safety tips, check out our article on DIY waste removal safety precautions.
Sorting and Separating Waste
Getting your waste sorted is half the battle. Here’s how to make it easy:
-
Sort It Out: Divide your waste into recyclables, non-recyclables, and hazardous stuff. It’s good for the planet and makes disposal simpler.
-
Label Everything: Clearly mark bins or bags for different types of waste. No more guessing games.
-
Recycle What You Can: Metals, plastics, glass—if it can be recycled, do it. Check local guidelines to make sure you’re doing it right.
-
Handle Hazardous Waste Carefully: Paint, chemicals, batteries—they need special treatment. Your local council can tell you how to dispose of them safely. For more on this, see our guide on DIY waste removal regulations.
-
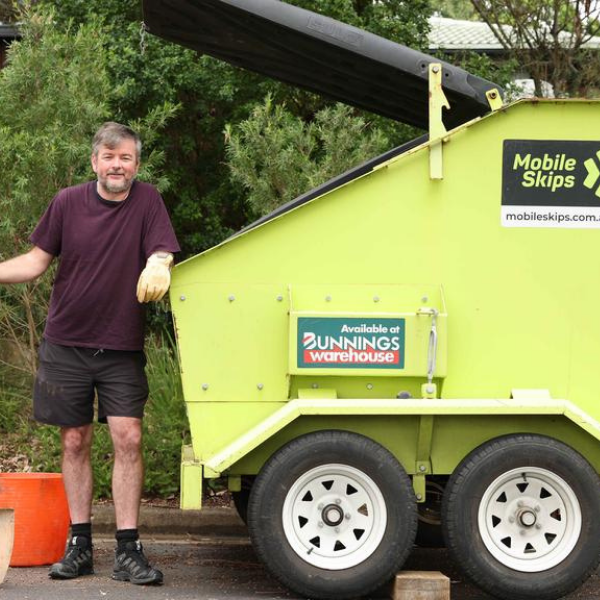
Skip the Hassle: For big projects, hire a skip bin. It’s a convenient way to collect and sort waste. Learn more about skip hire for home DIY.
| Waste Type | Disposal Method |
|---|---|
| Recyclables | Local recycling center |
| Non-recyclables | General waste collection |
| Hazardous Materials | Special disposal facilities |
| Organic Waste | Composting or green waste collection |
For more tips on sorting and separating waste, check out our article on DIY waste removal best practices.
By following these DIY waste removal tips, you’ll keep your renovation project safe and efficient. For more waste removal strategies, explore our resources on home DIY waste removal.
Handling Hazardous Waste
Renovating your home? It’s super important to deal with hazardous waste the right way to keep your family safe and protect the environment. Here’s how you can manage hazardous waste without breaking a sweat.
Spotting Hazardous Stuff
During a renovation, you might come across some nasty materials. Knowing what they are is the first step to getting rid of them safely.
- Asbestos: Found in older homes, especially in insulation, roofing, and tiles.
- Lead Paint: Common in homes built before the 1970s.
- Chemicals: Includes paints, solvents, and cleaning agents.
- Electrical Waste: Old wiring, batteries, and electronic devices.
- Mould: Grows in areas with water damage or high humidity.
| Material | Where You’ll Find It | Health Risks |
|---|---|---|
| Asbestos | Insulation, roofing, tiles | Lung disease, cancer |
| Lead Paint | Walls, doors, window frames | Lead poisoning, developmental issues |
| Chemicals | Paints, solvents, cleaning agents | Toxic exposure, respiratory issues |
| Electrical Waste | Wiring, batteries, electronics | Toxic exposure, environmental damage |
| Mould | Damp areas, water-damaged zones | Respiratory problems, allergic reactions |
Getting Rid of Hazardous Waste
Proper disposal is key to keeping everyone safe and sound. Here’s how to do it right:
-
Asbestos: Call in the pros. Seriously, don’t mess with this stuff yourself. Check out our guide on diy waste removal regulations for more info.
-
Lead Paint: If you think you’ve got lead paint, hire a certified lead abatement contractor. Don’t sand or disturb it without the right gear. See our diy waste removal safety precautions.
-
Chemicals: Many local councils have hazardous waste collection days or drop-off points. Never pour chemicals down the drain. Check our diy waste removal guidelines for more details.
-
Electrical Waste: Recycle electronics at e-waste facilities. Many retailers offer take-back programs. Learn more in our article on recycling options for diy waste.
-
Mould: Small patches can be cleaned with mould removal products, but big infestations need a pro. See our tips on diy waste removal site clean-up.
By spotting and safely getting rid of hazardous materials, your renovation project will be safe and eco-friendly. For more tips on waste removal, check out our diy waste removal best practices.
Wrapping Up Your Waste Removal
Cleaning Up
So, you’ve finished your renovation project. Now, it’s time to tackle the mess left behind. Cleaning up isn’t just about making things look nice; it’s about keeping everyone safe and healthy. A clean space means fewer accidents and a better environment for everyone living there.
Here’s a quick guide to help you clean up effectively:
- Get Rid of Big Stuff: Start by picking up large pieces of debris like wood scraps, metal bits, and other leftover materials.
- Vacuum and Sweep: Use a heavy-duty vacuum to suck up dust and small particles. Follow up with a good sweep to catch anything the vacuum missed.
- Wipe Everything Down: Grab a damp cloth and wipe down all surfaces—countertops, shelves, windowsills. Don’t forget those tricky corners.
- Proper Waste Disposal: Make sure you dispose of all waste correctly. Check out our home renovation debris removal guide for tips.
- Recycle and Upcycle: Separate out recyclable materials and think about upcycling old furniture or other items. Our article on recycling options for DIY waste has more ideas.
Evaluating Your Process
After the clean-up, it’s time to see how well you did. Evaluating your waste removal process helps you spot areas where you can do better next time.
Here are some things to think about:
- How Did the Plan Work?: Look back at your initial plan. Did everything go as expected? Were there any surprises?
- Time Management: How long did each part of the clean-up take? Were there any delays? Think about how you can save time in future projects.
- Cost Check: Compare what you spent on waste removal to your budget. For more on costs, visit our DIY waste removal cost page.
- Safety First: Review the safety measures you took. Were there any accidents or close calls? Our article on DIY waste removal safety precautions has more tips.
- Environmental Impact: Think about how your waste removal affected the environment. Did you recycle or upcycle as much as possible? Check out our eco-friendly options to reduce your footprint.
By evaluating your process, you can make future projects smoother, cheaper, and safer. For more detailed advice, refer to our DIY waste removal guidelines and best practices.